Releasing Tokens
Interacting with Vesting Contracts
Releasing unlocked GRT tokens from your vesting contract is straightforward. You can do so by interacting with the contract via Remix. We’ve also got a guide on withdrawing delegation rewards from a vesting contract in case you also want to do that.
Update: Here’s the same guide but instead of using Remix it uses Etherscan: Releasing via Etherscan. We have received feedback that many prefer to use Etherscan because it’s easier.
Video Tutorial
Step-by-step Video Guide
This guide on releasing unlocked tokens from your vesting contract is also available as a video:
Releasing unlocked tokens from vesting contract in 3 steps.
Here’s what you’re going to learn today. We’ll have a detailed look at each step in the explanations below.
Step 1 – Identifying Your Vesting Contract Address.
No worries if you aren’t sure what your vesting contract address is. You can find out really quick by querying The Graph API. All you need to do is to visit The Graph Explorer, copy & paste the following command:
And enter your ETH address where it says “Your ETH Address.” After this, hit the play button and you’ll see your contract address. Let’s do exactly that with an example ETH address:
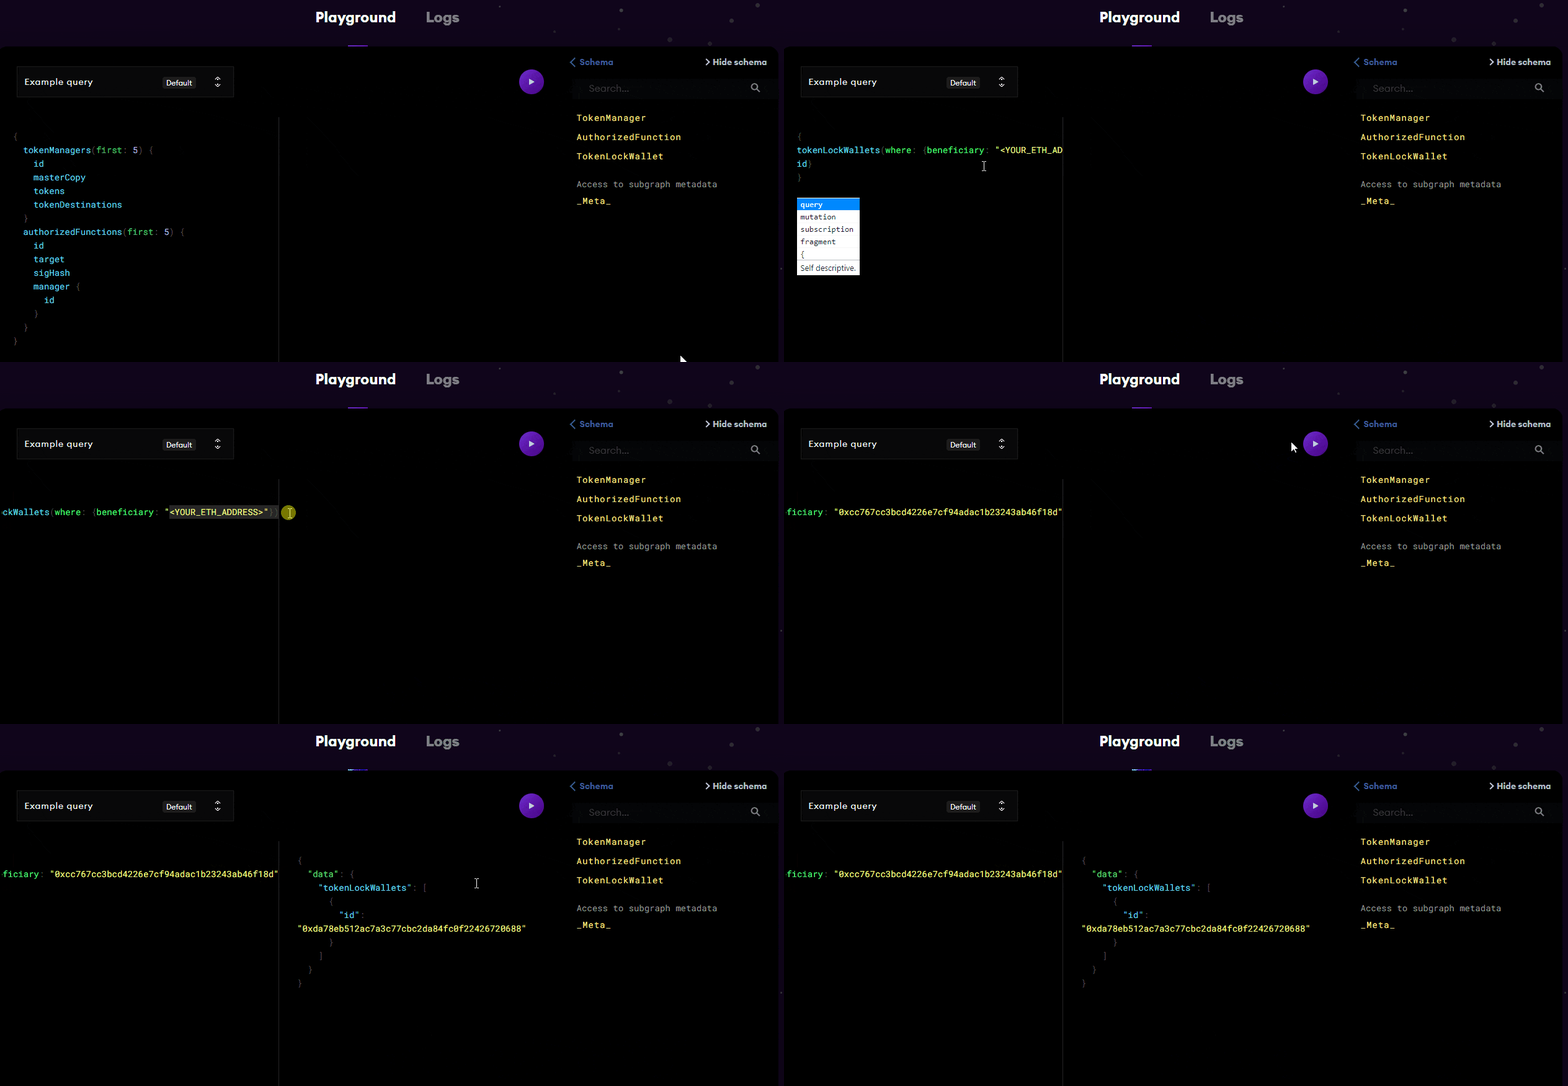
Once you’ve written down your vesting contract address, we can go ahead.
Step 2 – Connecting to Your Beneficiary Address.
Install the MetaMask extension in your browser (if you haven’t already) and connect your ETH address to it. If you have already done that, simply log into MetaMask. Make sure that you are using the beneficiary ETH address that is connected to your vesting contract.
Step 3 – Interacting with Your Vesting Contract.
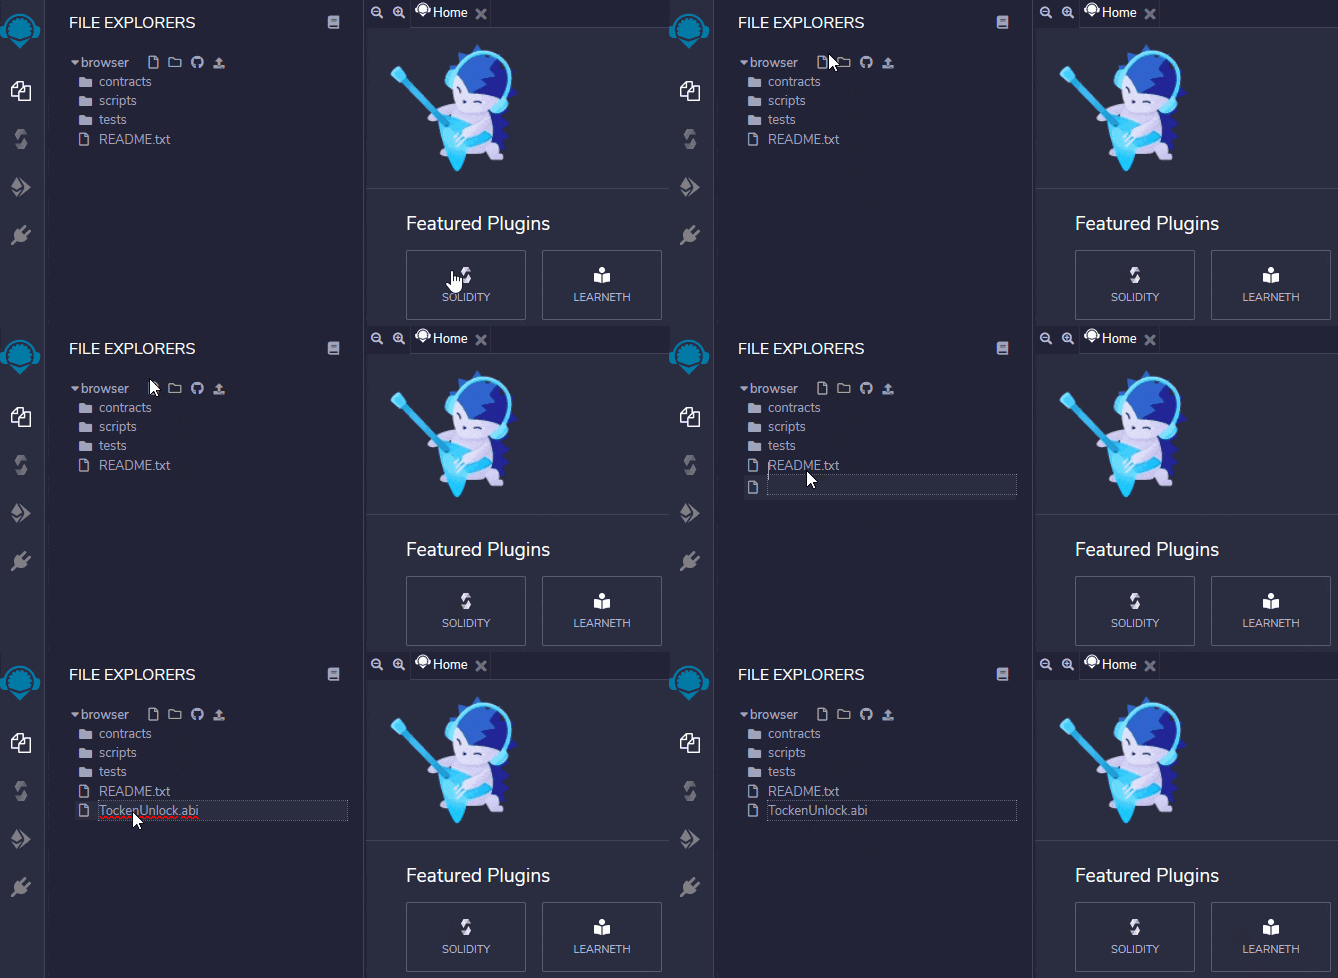
Open the Remix app in the web browser that you are using MetaMask with. Next, click on the file icon to create a new file. You can call the file “TockenUnlock.abi”. Confirm by hitting enter.
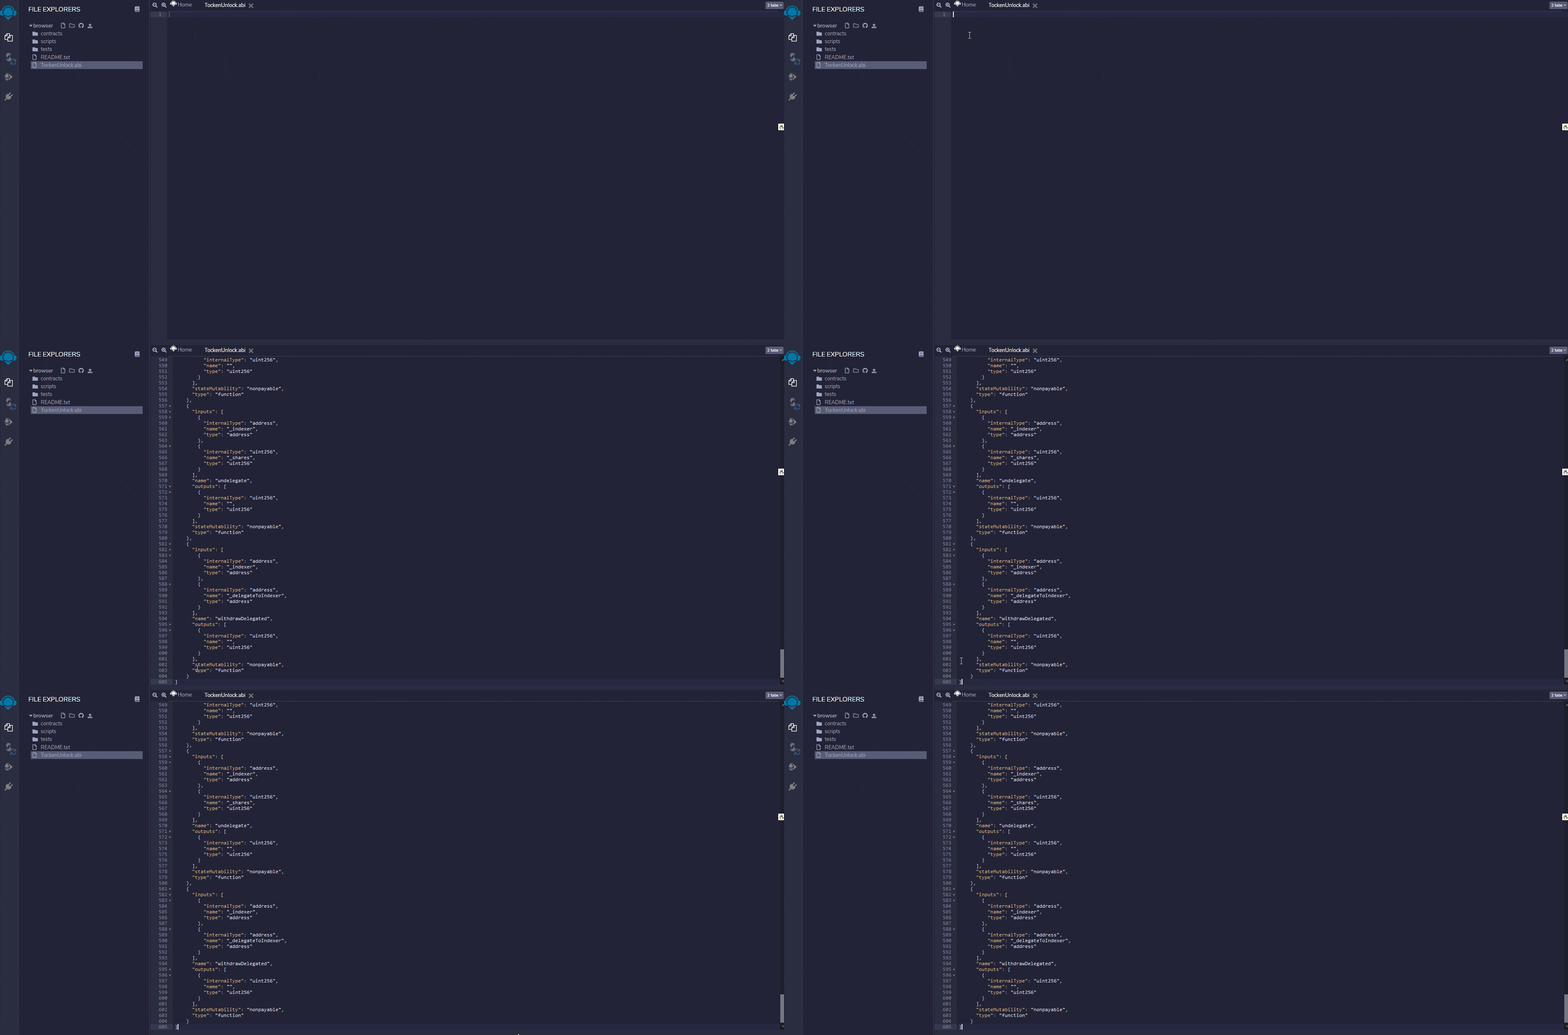
Next, copy the code from Edge & Node team member Abarmat that he published on GitHub. You can then paste the code into the TokenLockWallet.abi which you have just created. Make sure there are a total of 605 lines of code.
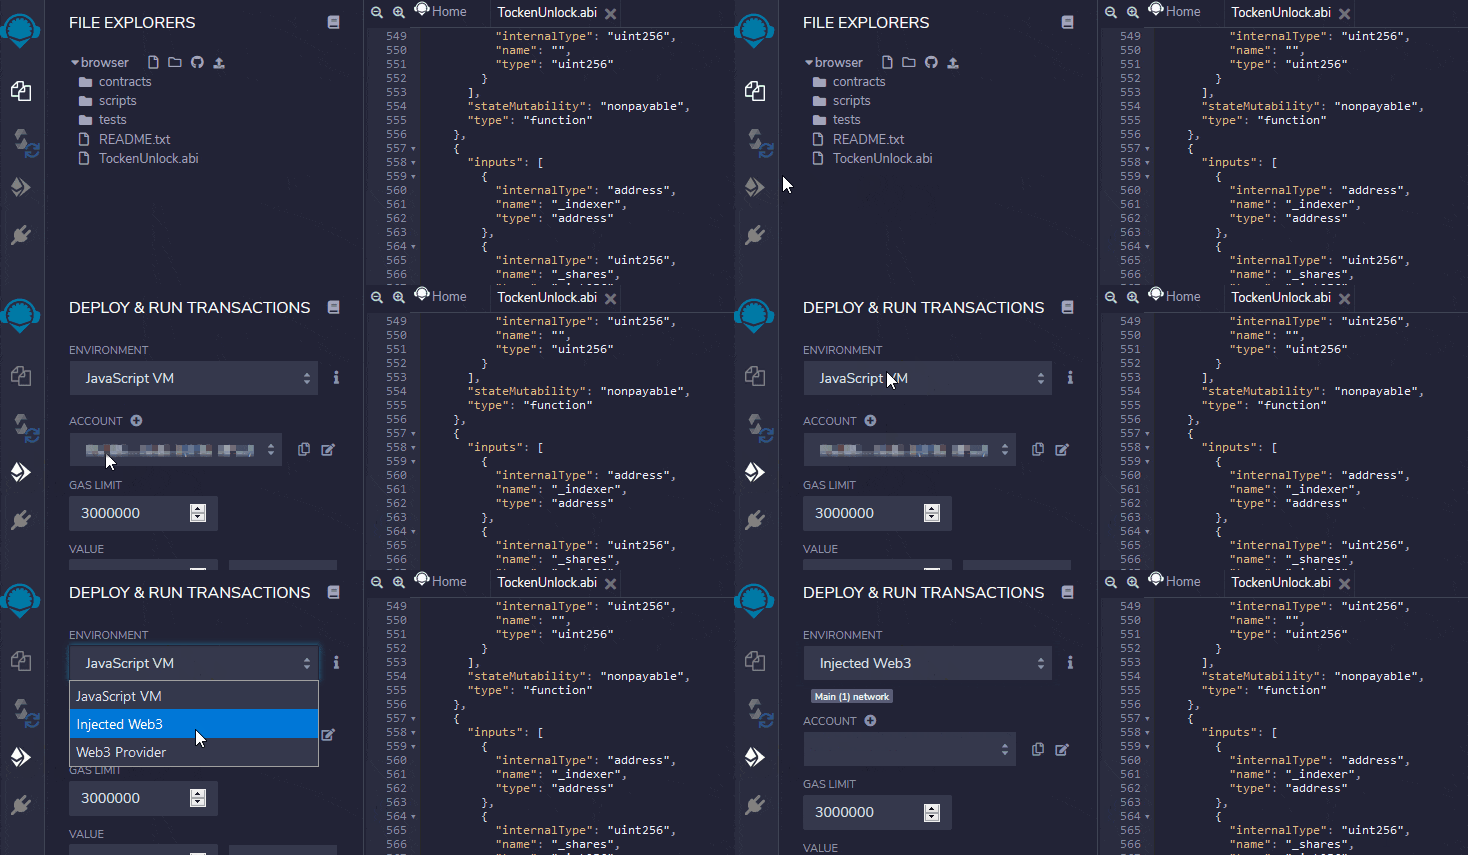
In the next step, click on the ETH symbol you can find on the left-hand side. This will forward you to the page where you can deploy & run transactions. Over there, select “Injected Web3” as your environment.
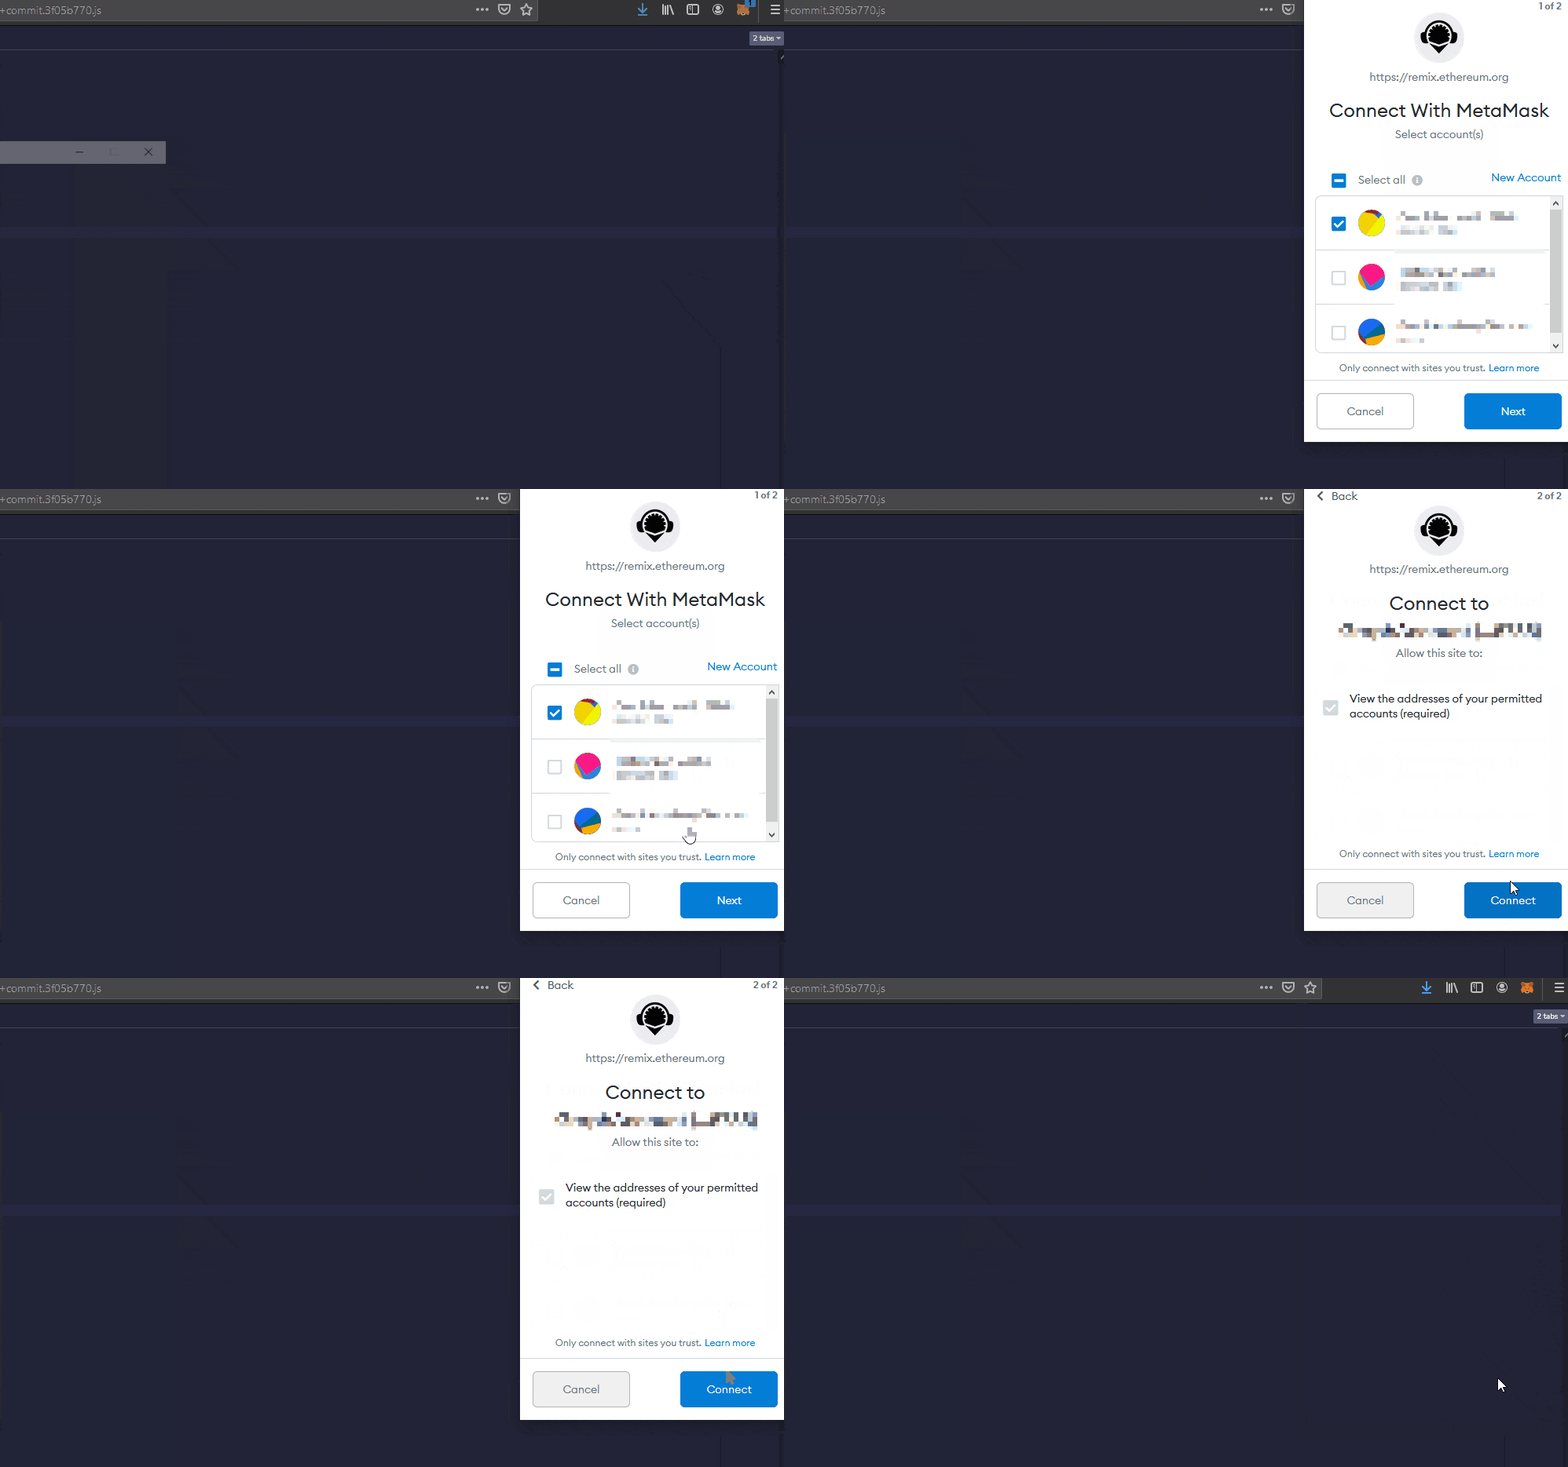
This will prompt a MetaMask message asking you to connect your wallet. Select your beneficiary ETH address, click on “Next” and “Connect” to connect your wallet.
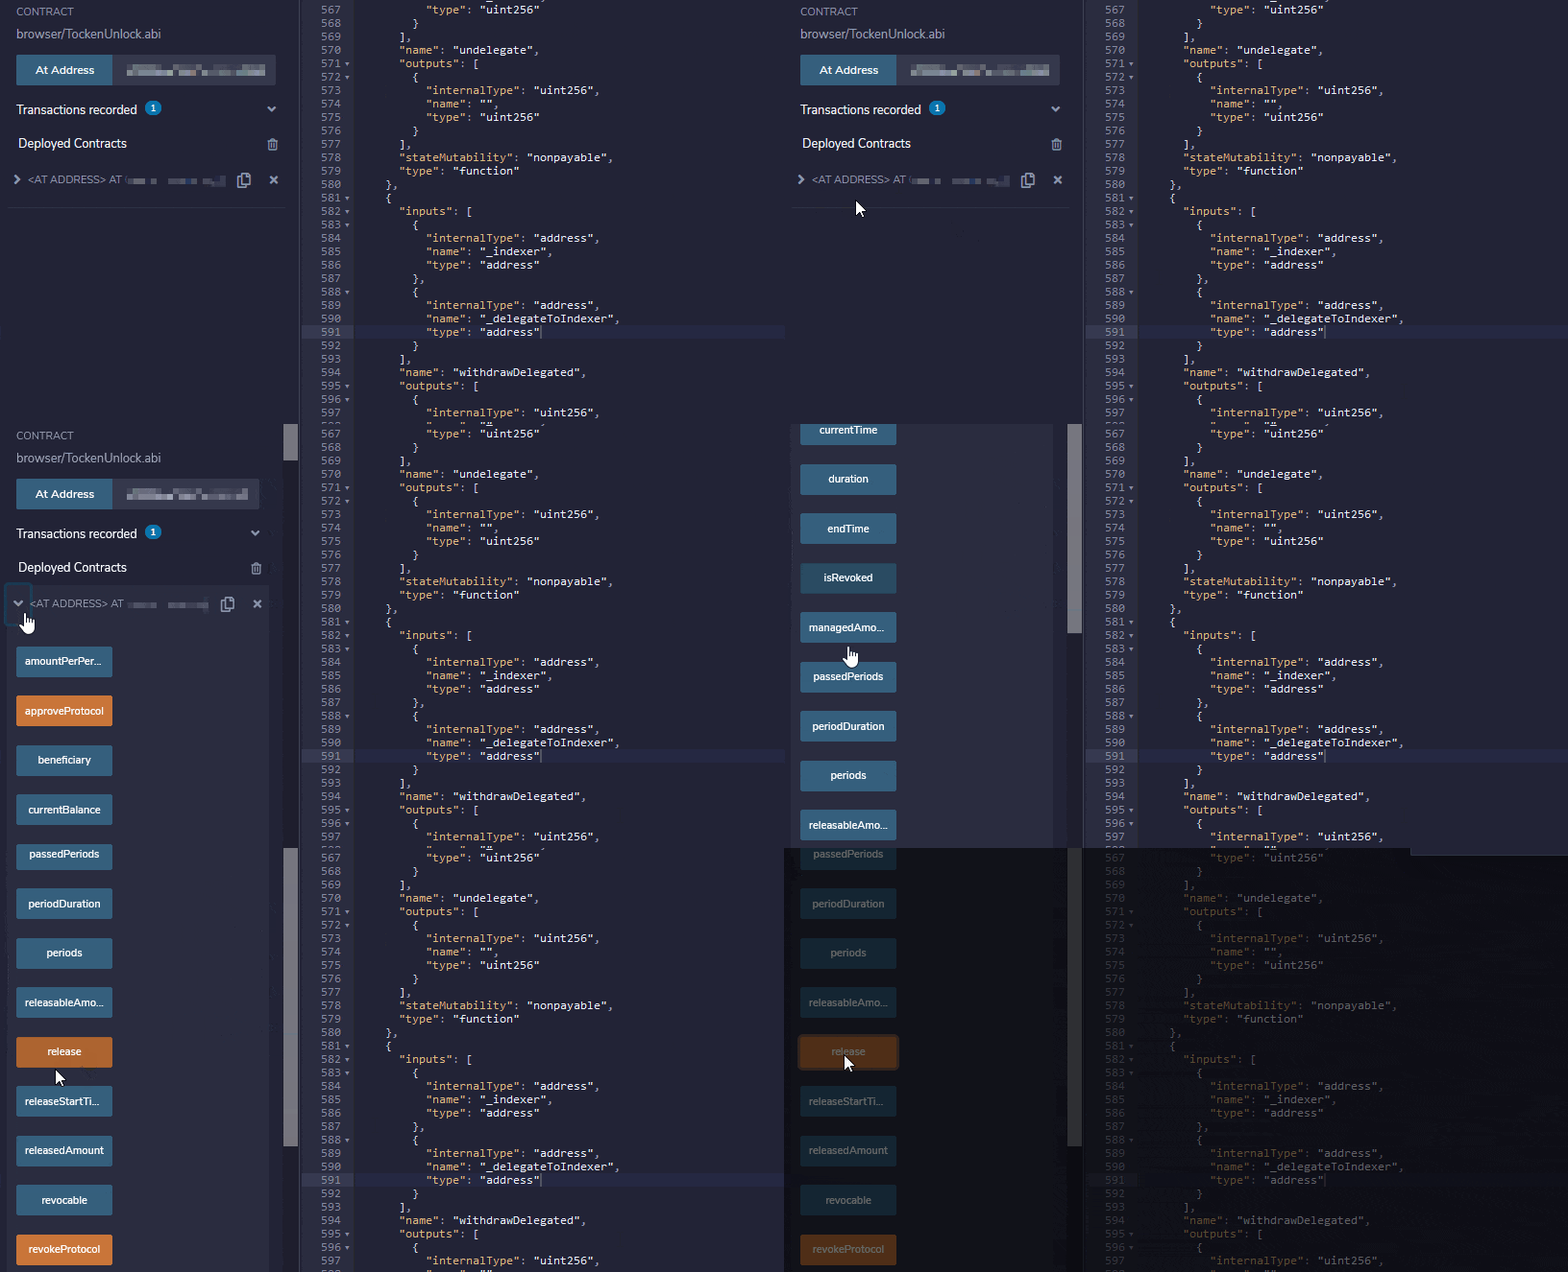
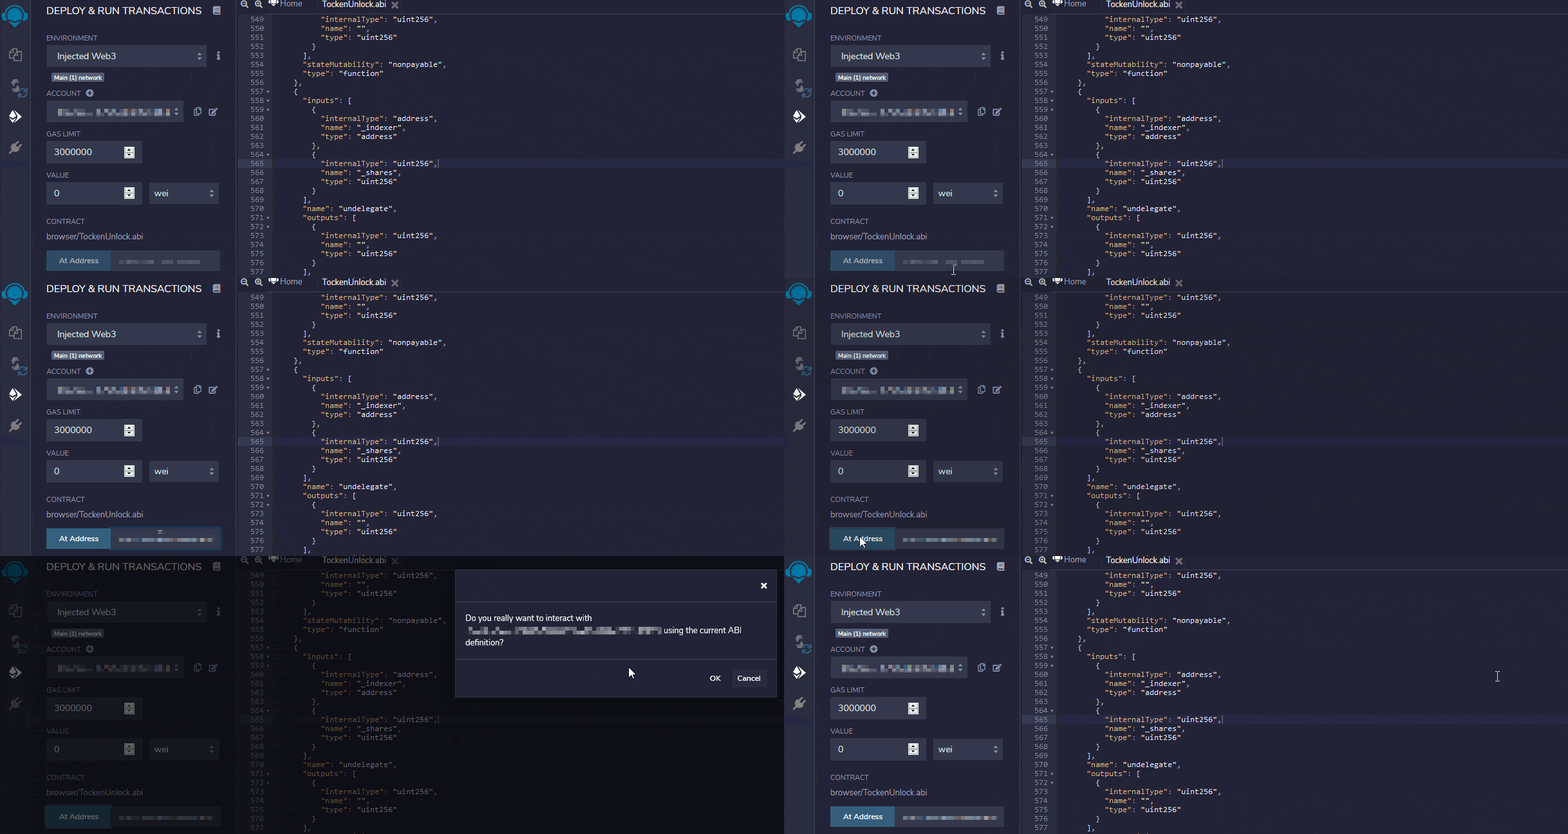
Once you are connected to MetaMask, you can paste the vesting contract address you copied earlier into the “At Address” field. After this, click the “At Address” button and confirm the message that pops up by clicking “OK.”
After having added the vesting contract address, you can scroll down to the section “Deployed Contracts.” Expand the section and scroll down to where it says “release.”
