Learning how to curate
Curating a Subgraph with MetaMask.
Do you want to become a Curator in The Graph Network? In this step-by-step tutorial, we’ll show you how it’s done. We’ll use MetaMask for this tutorial as it’s easy to use and works seamlessly with The Graph Protocol. If you haven’t already, download MetaMask. Here’s a guide for installing MetaMask. After you’re finished, we can get started with this guide.
Video Tutorial
Step-by-step Video Guide
This guide on signaling a Subgraph is also available as a video:
Curating in 3 easy steps.
Here’s what you’re going to learn today. We’ll have a detailed look at each step in the explanations below.
Step 1 – Connecting MetaMask.
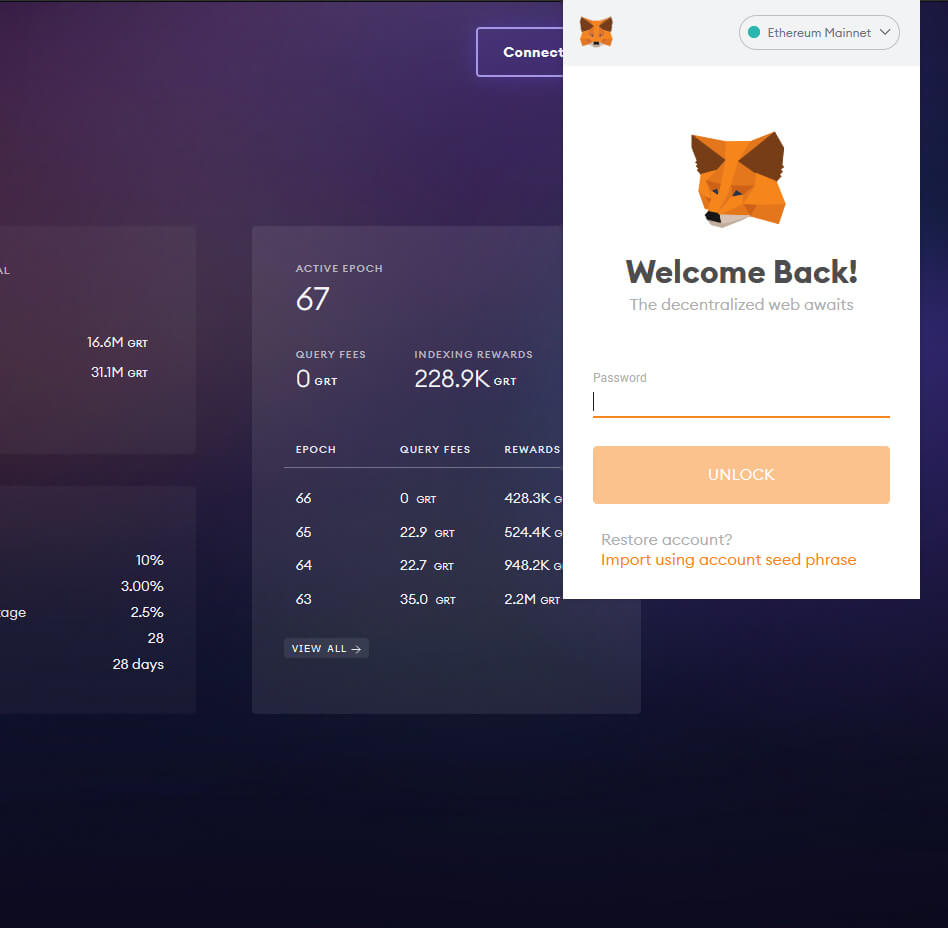
After you’ve created a wallet with MetaMask or logged into your existing account, you can connect your wallet to The Graph Network. To do so, visit the official network page and click on the Connect Wallet button.
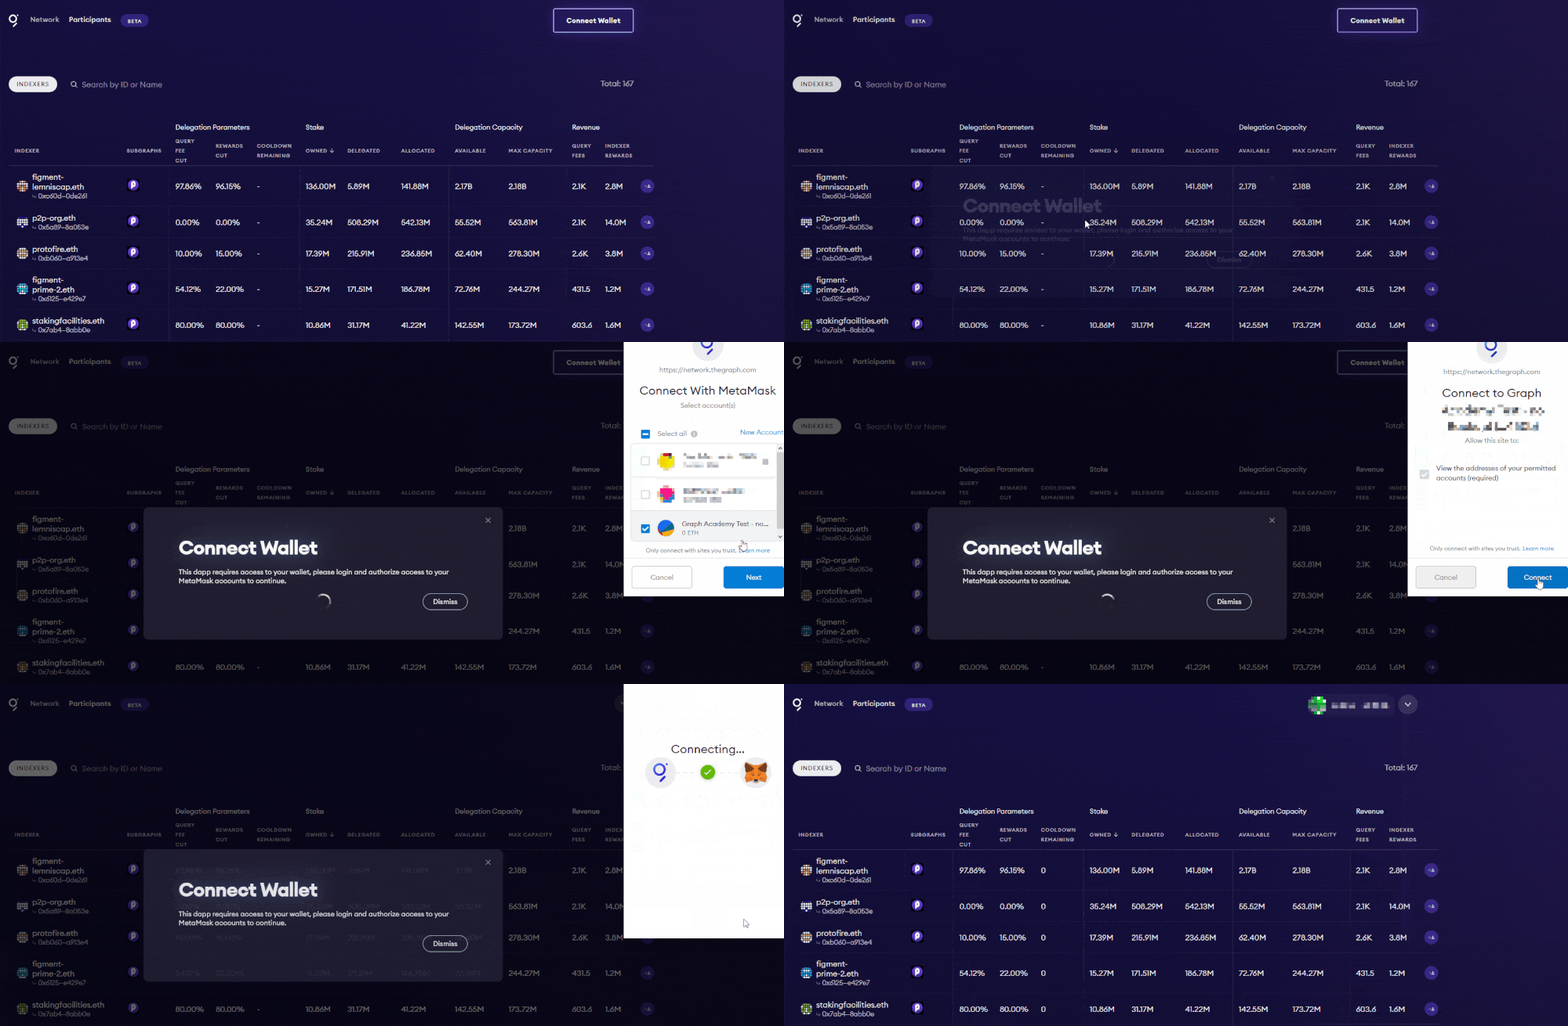
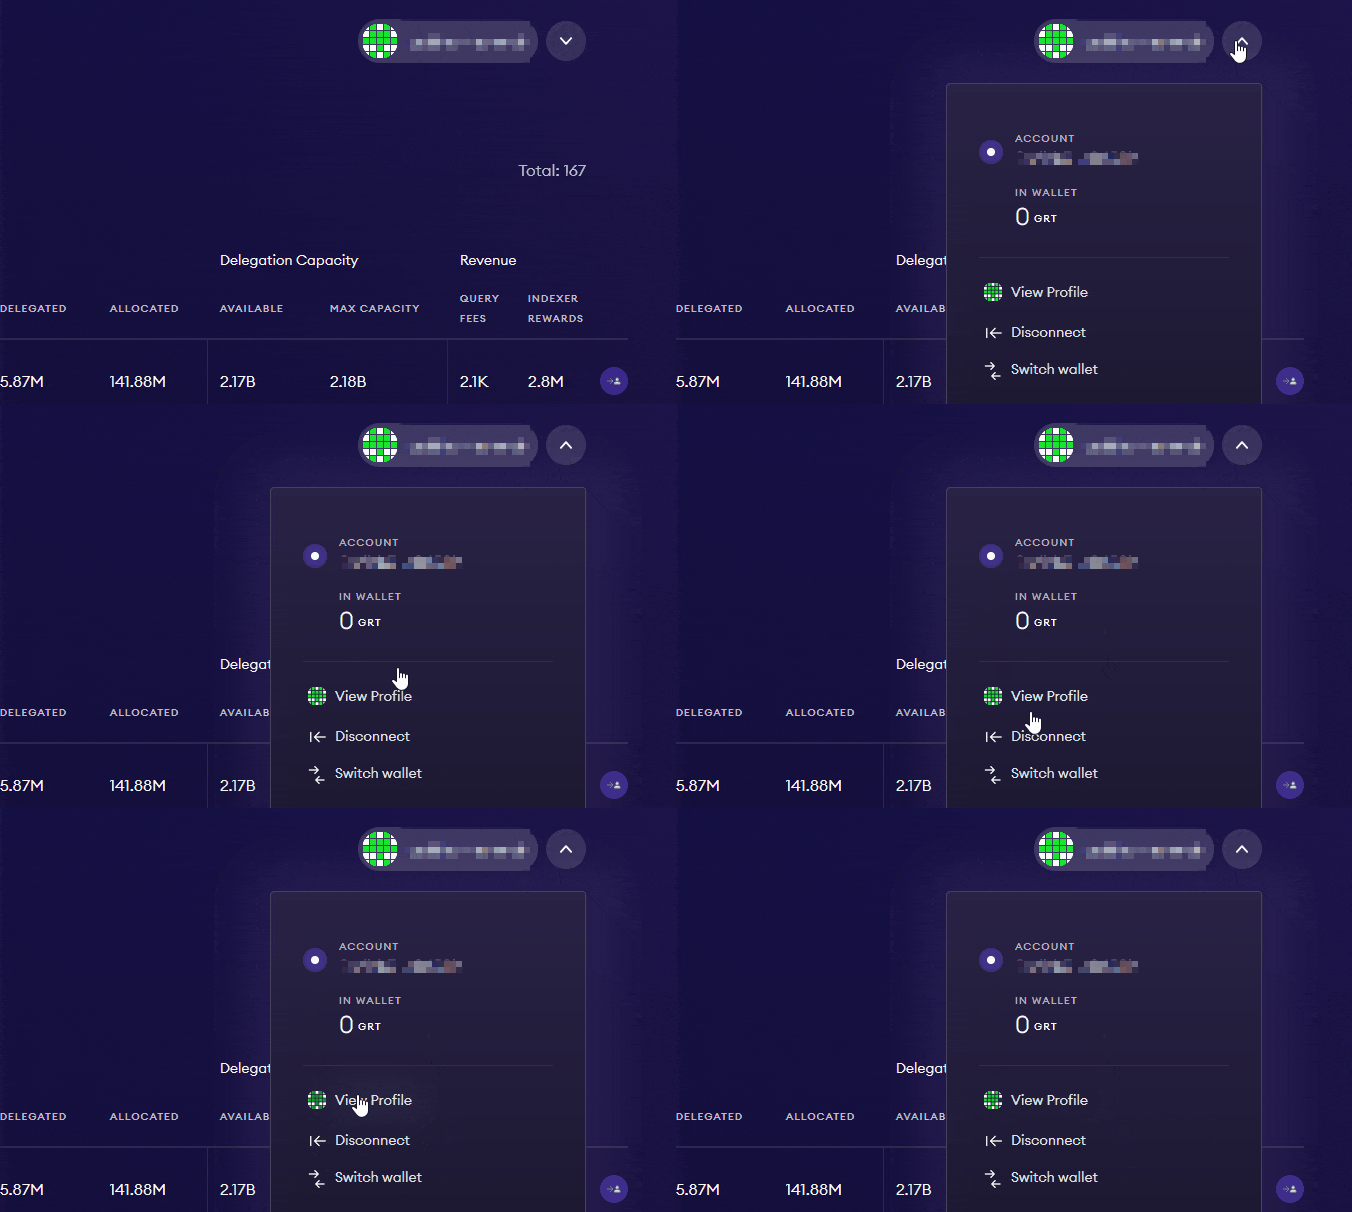
You can now find your connected account in the upper right corner of the Network dAPP of The Graph. It shows the number of GRT you have in your MetaMask wallet and gives you access to your profile.
Add GRT to MetaMask
Once you’re connected, add the GRT token to your wallet. Otherwise, your GRT will not be displayed in MetaMask. It’s really simple, just open MetaMask, click on Assets and then on Add Token. Enter GRT and you’re good to go!
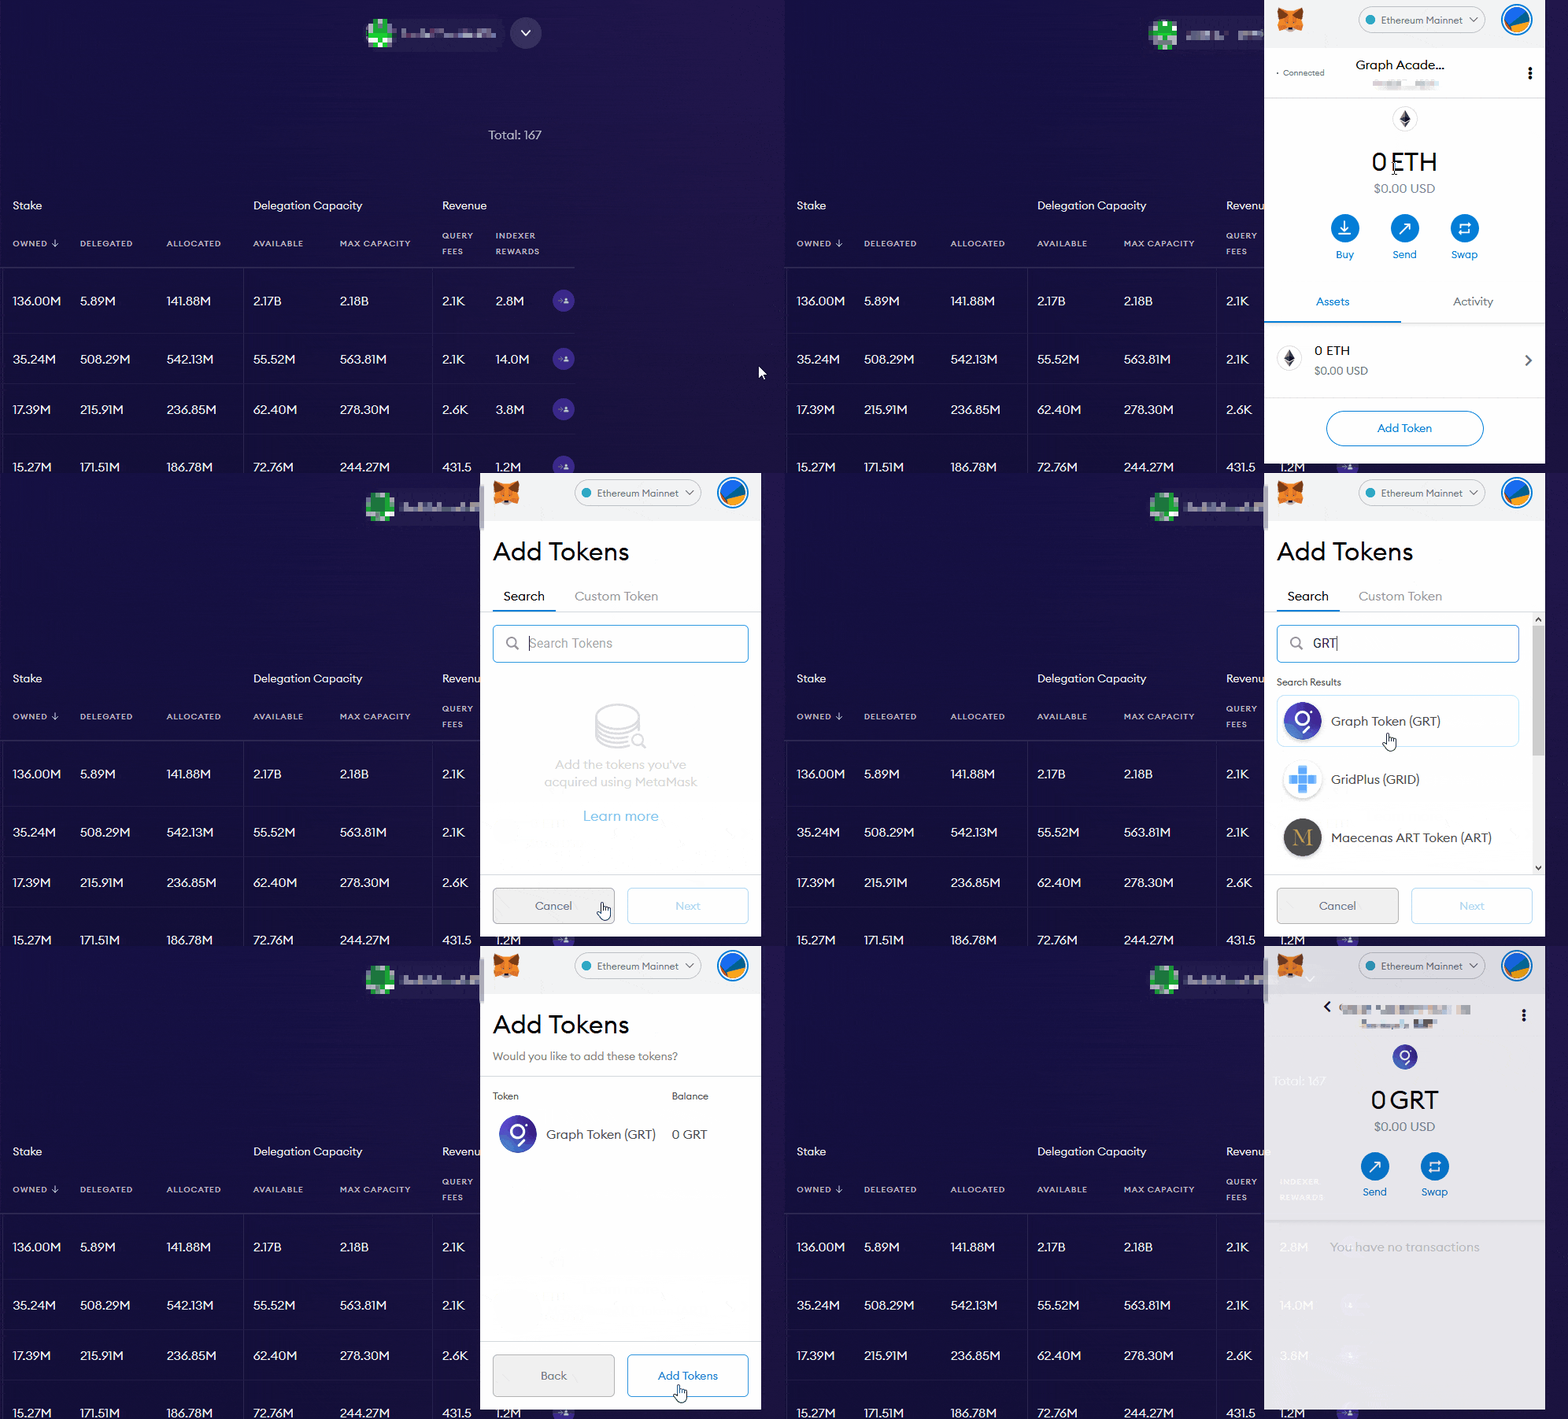
Send GRT tokens and ETH to your wallet
In case you haven’t already, send over the GRT tokens you bought on the exchange of your choice and – to cover gas fees – a small amount of ETH (~$50-100). The delegation contracts of The Graph Protocol are deployed on Ethereum. For this reason, you will interact with these contracts when delegating to an Indexer, which costs transaction fees (gas).
You can find your ETH address in your dashboard:
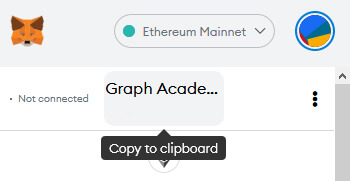
Once you have copied your ETH address, you can send the ETH and your GRT tokens for your wallet. Make sure to double check that your wallet you’re going to withdraw to is correct. Once your wallet is loaded with ETH and GRT, which can take several minutes or even hours, you’re now ready to delegate.
Step 1b – Hardware Wallet.
Instead of Metamask’s soft wallet, you can also use a hard wallet, such as Ledger, to delegate your GRT. Hard wallets can add another layer of security as they typically require physical device confirmation of transactions. You can connect Metamask to your hardware wallet via the Metamask Browser Extension. Make sure to have the ETH app open on your Ledger device and to have ‘Contract Data’ allowed within the ETH app on your device. See below screenshot on how to connect a hardware wallet in Metamask.
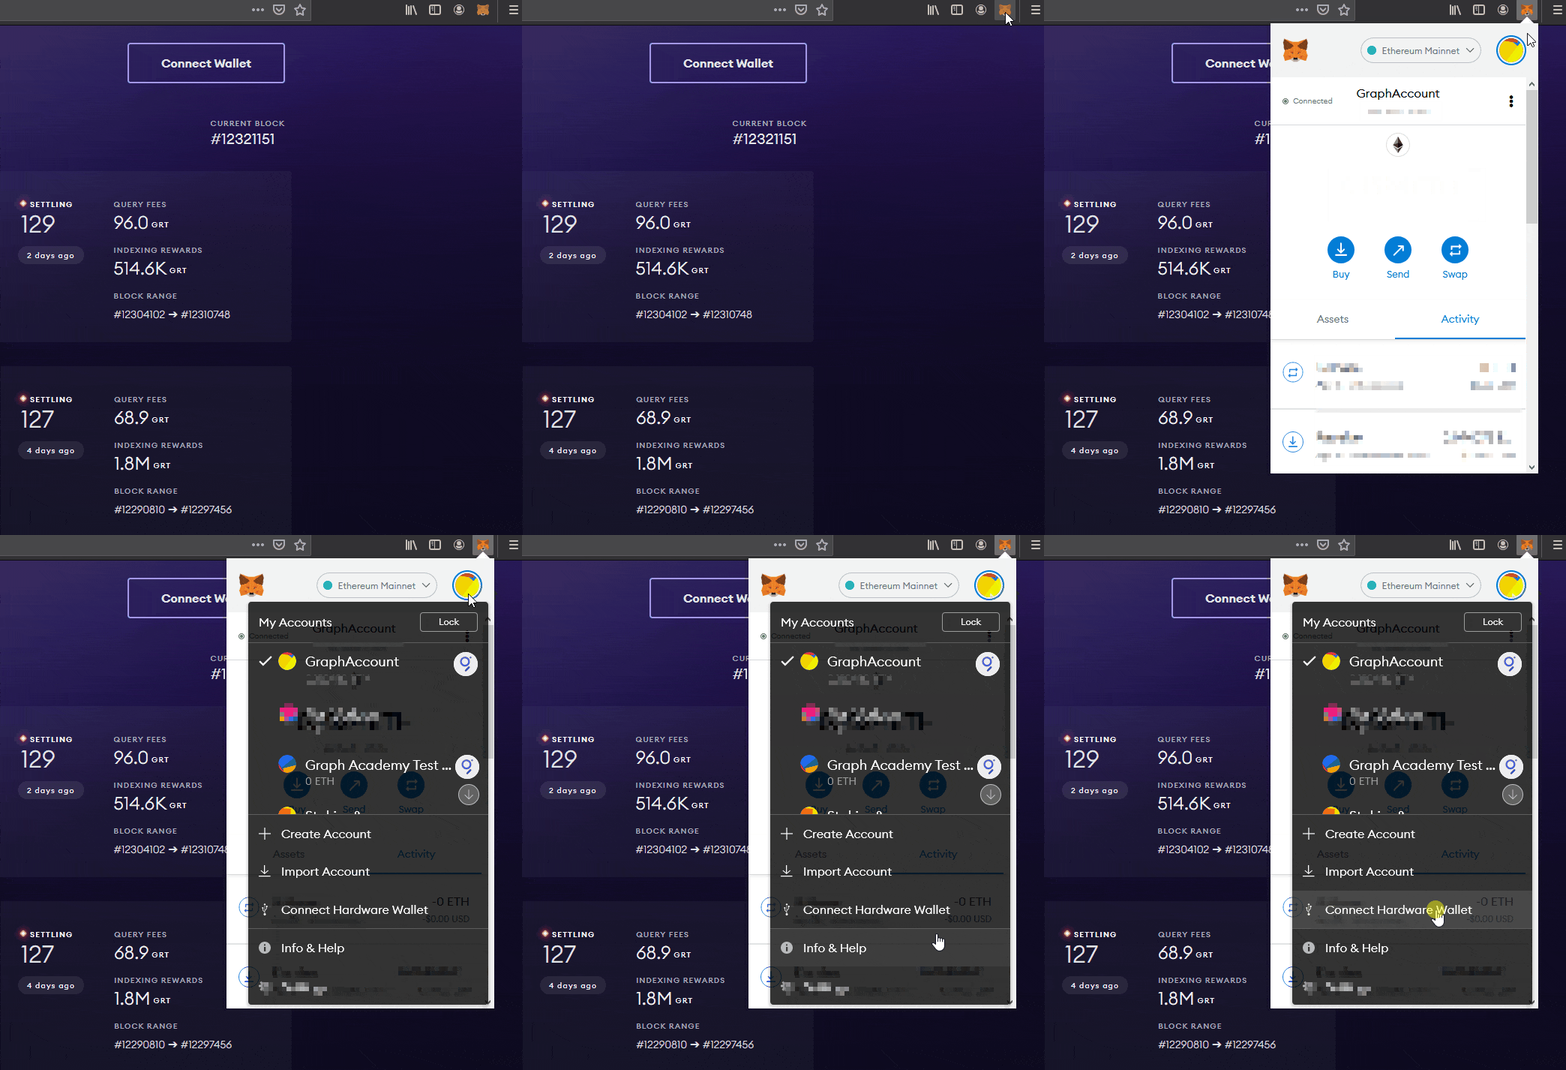
Step 2 – Curating a Subgraph.
Once you have found an attractive Subgraph you want to curate, you can go ahead and make your very first interaction with the curation contracts of The Graph. To do so, search and select the subgraph you want to curate.

In the next step, click on Signal to curate the Subgraph of your choice.

Step 3 – Confirming transactions.
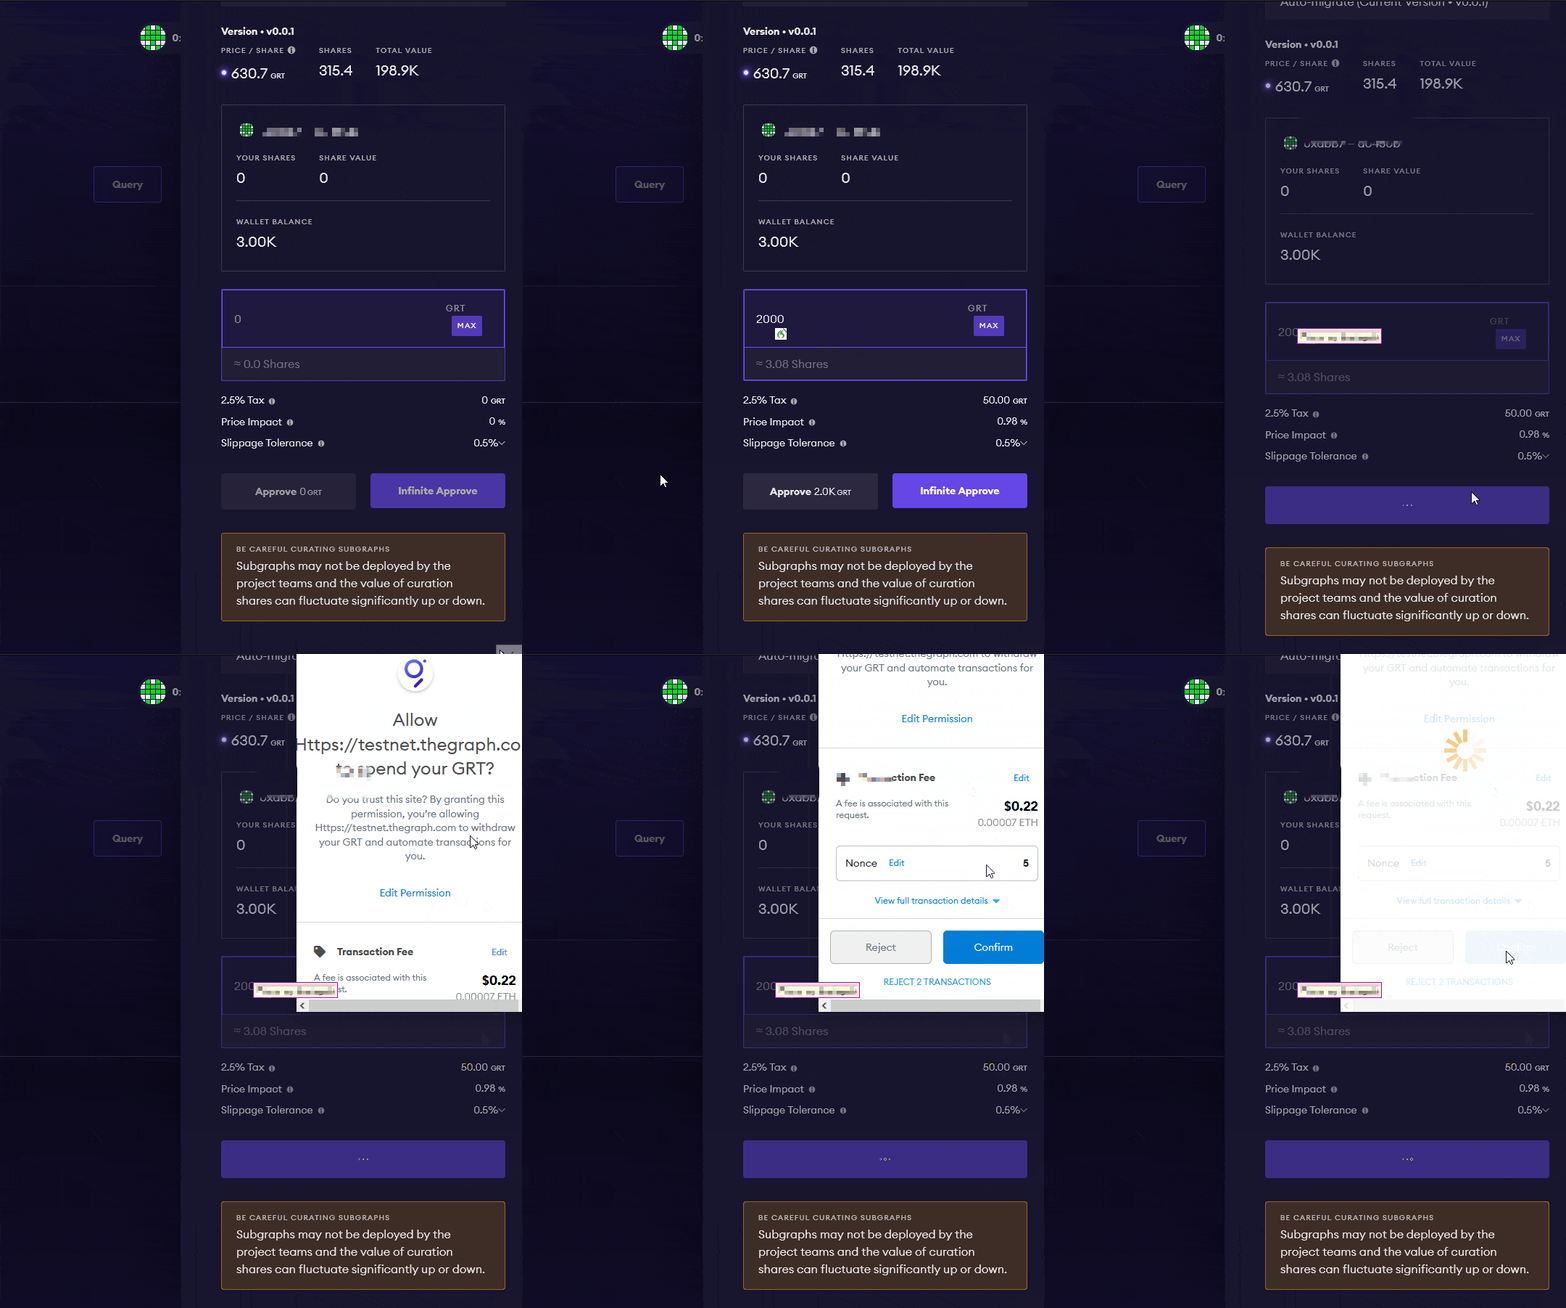
Once you’ve clicked the button Signal, you can select how many shares of the Subgraph you would like to mint. Be sure to leave the version option Auto-migrate checked.
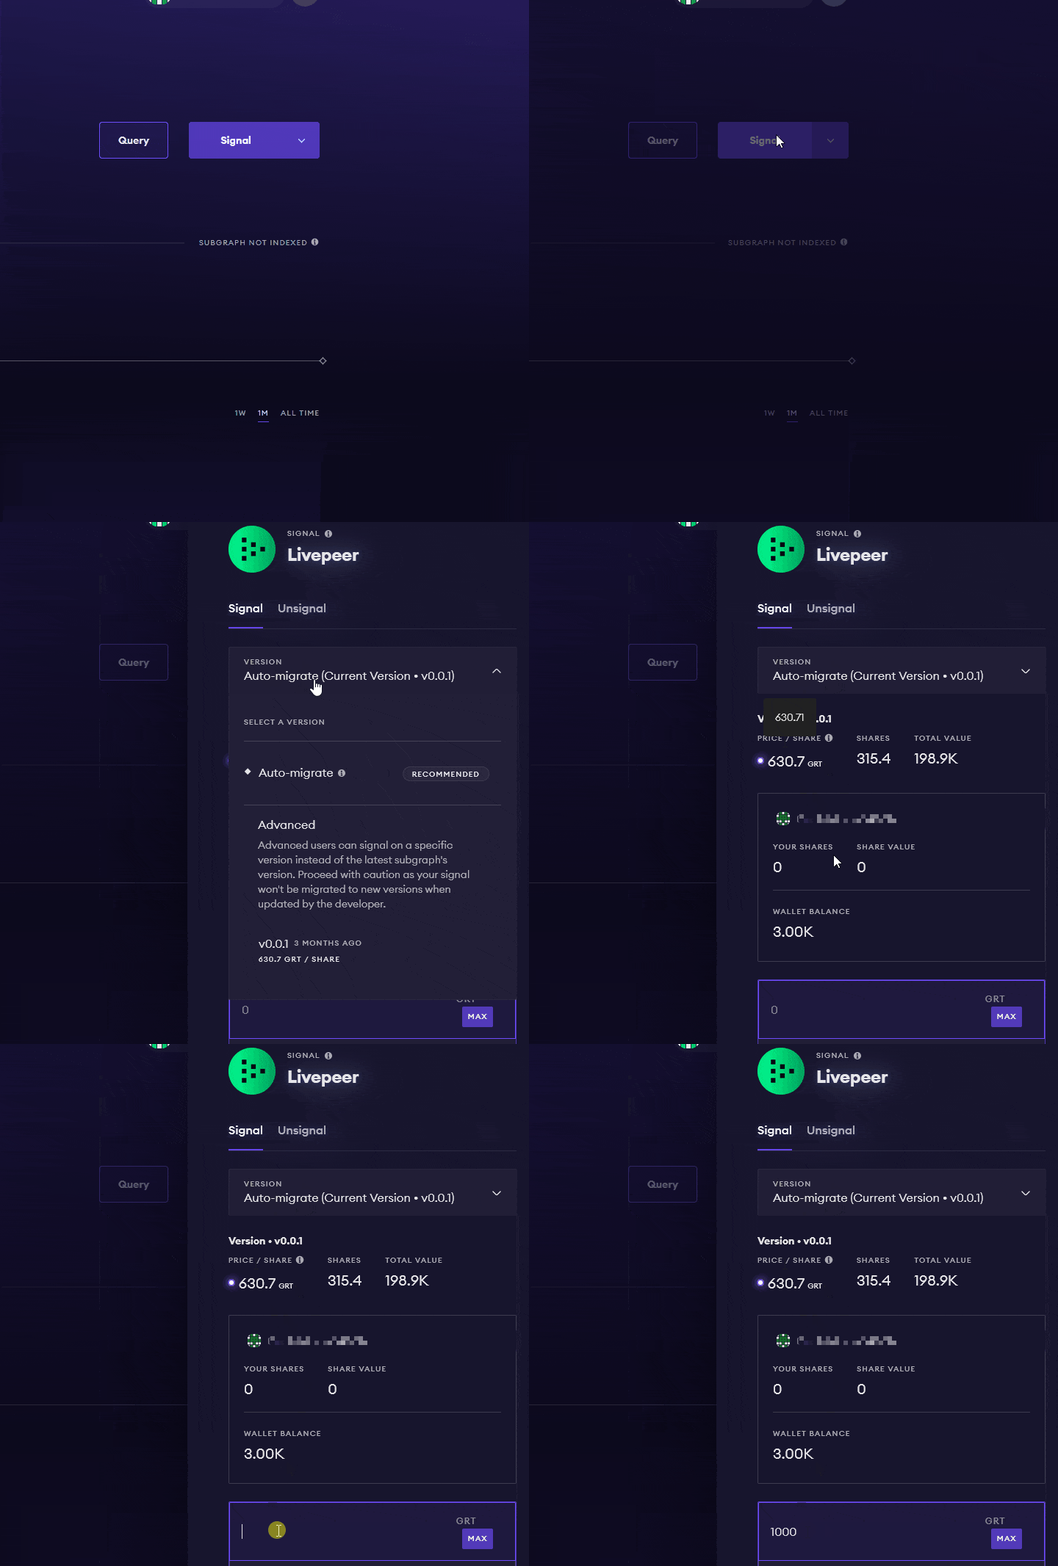
There are two options for approving the transaction. Approve means you approve that one transaction. Infinite approve means you approve that transaction and all future transactions. This saves you gas but reduces security.
If you click on approve / infinite approve, Meta-Mask will now ask you to confirm that you allow thegraph.com to spend your GRT for curation.
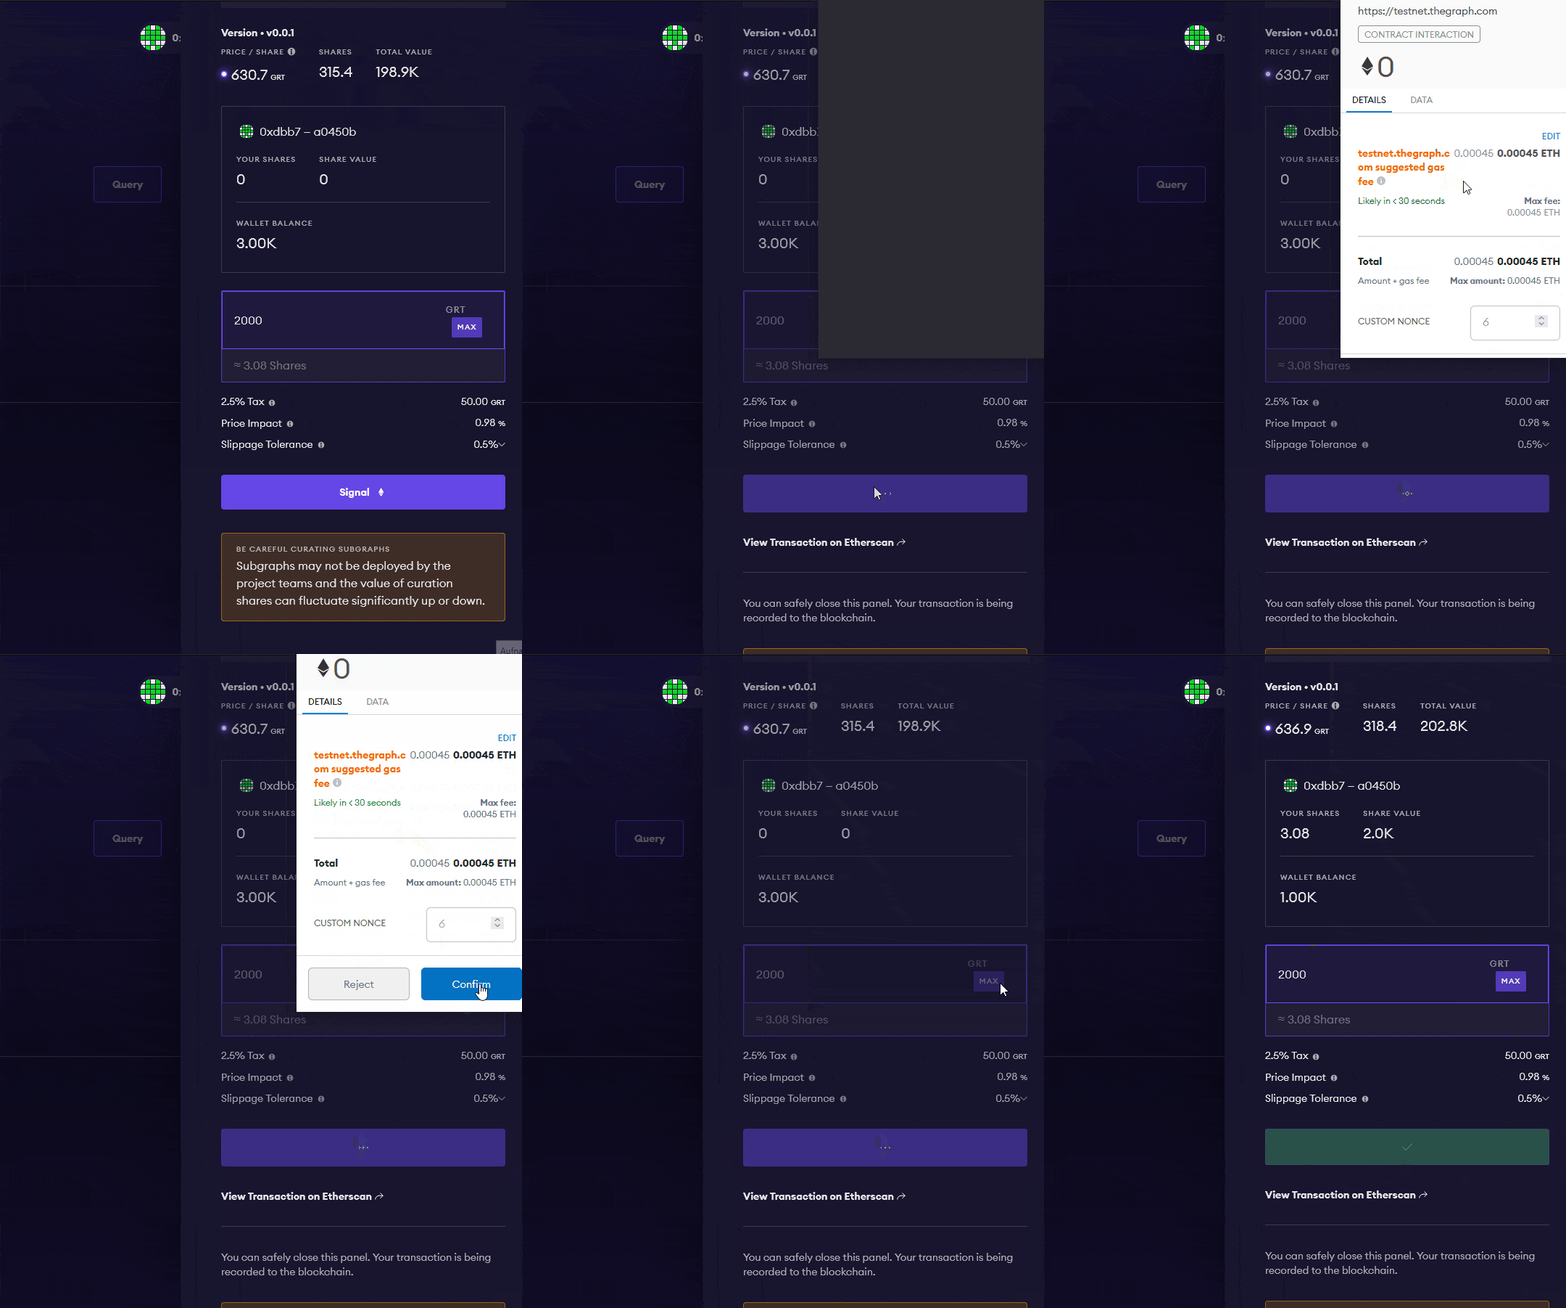
You can now click on Signal to curate the Subgraph.
If you do not want your transaction to be stuck in the network, it’s recommended to customize the amount of gas. To do so, click on Edit and then in the next window on Fast.
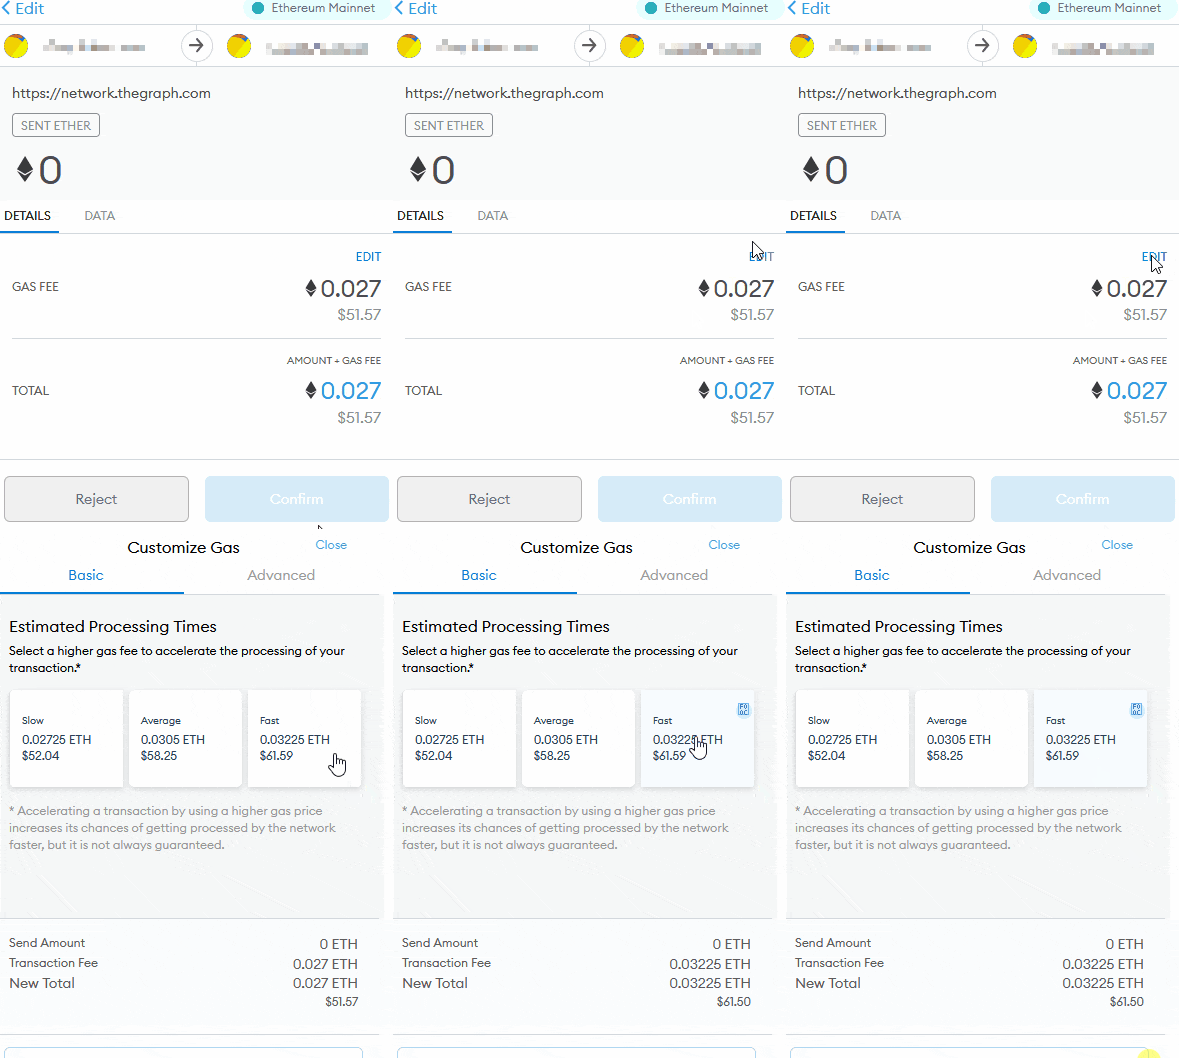
After that click on Submit Transaction and Confirm the transaction in the next step.


